

How to Edit Photos in Lightroom for Natural Light Senior Photos

Have you ever finished a senior session feeling amazing…
Only to get home, open Lightroom, and immediately feel overwhelmed?
There are sliders everywhere. Every photo looks a little different. You adjust one thing, then another, and before you know it you’ve spent an hour editing just a handful of images.
We’ve been there.
The good news is that editing doesn’t have to be complicated. In fact, the biggest secret to faster editing doesn’t even start inside Lightroom.
It starts with good light.
When your photos are captured in clean, even light, Lightroom becomes a tool for enhancing your images instead of trying to rescue them.
Today we’re walking you through the exact Lightroom workflow we use for our natural light senior portraits. Nothing fancy. Nothing complicated. Just a simple editing process that creates clean, consistent images every time.
Start with great light before you ever open Lightroom


Here’s something that surprises a lot of photographers.
Your editing workflow is only as good as the photo you took.
If your subject is standing in patchy light, harsh sunlight, or mixed lighting, Lightroom has to work overtime to fix problems that could have been avoided during the session.
That’s why we always start by placing our seniors in soft, even light. Open shade is one of our favorite options because it gives us beautiful skin tones and consistent exposure across the entire face.
The better your light is in camera, the less editing you’ll need later.
Your future self will thank you.
Begin every Lightroom edit with lens corrections and cropping


Before touching any exposure sliders, we always make two quick adjustments.
First, we enable Profile Corrections under the Lens Corrections panel. This removes the natural vignetting created by many lenses and instantly brightens the image.
Next, we crop and straighten the photo if needed.
Getting the composition right first makes every other editing decision easier because you’re looking at the final framing while making your adjustments.
It’s a tiny step that saves time later.
Adjust exposure before worrying about the small details


Once the photo is framed correctly, it’s time to work through the Basic panel.
Rather than jumping around randomly, we always follow the same order.
We start by adjusting exposure until the image feels bright and balanced. Then we add a little contrast to give the photo more depth before bringing the highlights down to recover detail in bright areas like clothing and skin.
Next, we lift the shadows slightly to open up darker areas without making the image look flat.
Finally, we fine-tune the whites and blacks to add just enough contrast while keeping everything soft and natural.
Following the same order every single time keeps editing consistent from one gallery to the next.
Fine-tune white balance for natural skin tones

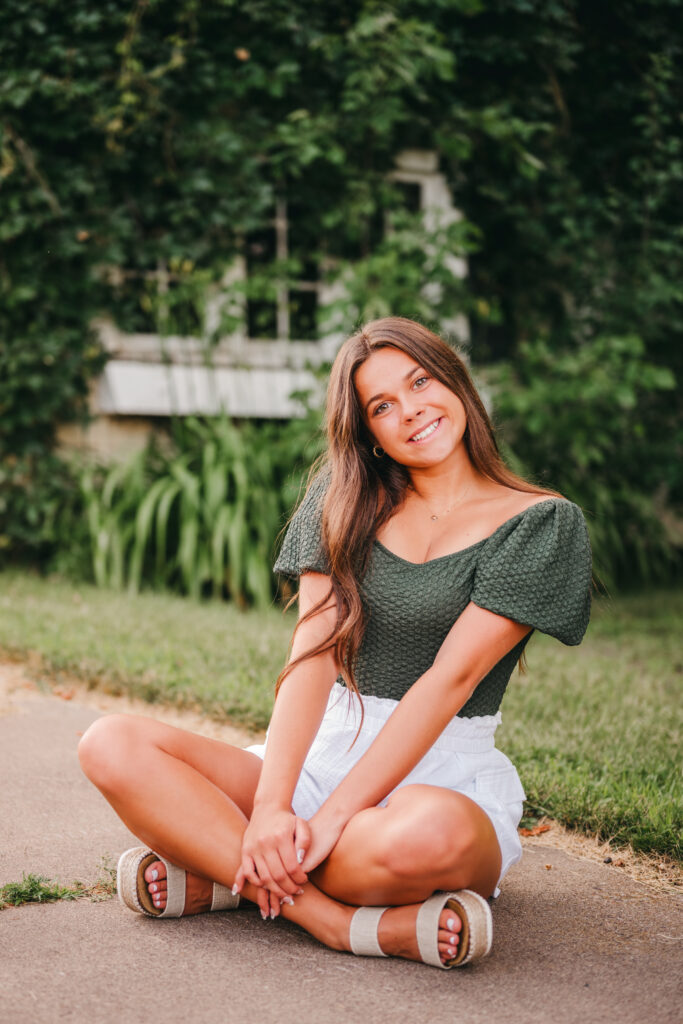
One of the fastest ways to make a portrait look unrealistic is incorrect white balance.
Sometimes an image comes into Lightroom looking too blue. Other times it feels too yellow or orange.
Instead of focusing on the entire image, watch your subject’s skin.
Skin tones tell you almost everything you need to know.
If they look healthy and natural, you’re usually in a great place.
Don’t chase perfect numbers.
Chase natural-looking people.
Add vibrance without making colors look fake


Senior portraits should feel colorful and full of life.
That doesn’t mean every color needs to be cranked to 100.
Instead of increasing overall saturation, we usually prefer adding a small amount of Vibrance. Vibrance boosts the colors that need a little help while protecting skin tones from becoming overly orange.
Sometimes we’ll also adjust individual color channels if the greens or yellows in the background feel overpowering, but most of the time a simple vibrance adjustment is all we need.
Simple wins.

Use local adjustments to enhance your portraits
Once the overall image looks good, we zoom in and work on the details.
Our favorite adjustment is Soften Skin Light.
Notice we said light.


It’s easy to overdo skin smoothing and end up making someone look like a plastic mannequin. Instead, we lower the texture and clarity just enough to soften the skin while keeping it realistic.
From there, we’ll remove temporary blemishes using the Healing Tool while leaving permanent features like freckles and moles alone.
Our goal isn’t to change how someone looks.
It’s simply to help them look like their best self.
Brighten eyes and whiten teeth naturally


Eyes are one of the first places people look in a portrait.
A subtle iris enhancement can help them stand out without making them look fake.
The same goes for teeth whitening.
A tiny adjustment can freshen up a smile, but too much quickly becomes distracting.
If someone notices the editing before they notice the person, it’s probably too much.
We always aim for edits that feel invisible.
Copy and paste your Lightroom edits to save hours
Here’s one of the biggest time-saving tips we can give you.
If you photographed multiple poses in the same location using the same camera settings, don’t start every edit from scratch.
Copy your basic adjustments and paste them onto the next image.
Exposure, contrast, highlights, shadows, and white balance usually transfer beautifully.
Just leave out local adjustments like skin softening, teeth whitening, blemish removal, and eye enhancements since every portrait is different.
This one trick alone can save hours when editing an entire senior gallery.
Consistency matters more than perfection


One of the biggest mistakes beginner photographers make is editing every single image differently.
One photo is cool.
The next one is warm.
One has heavy contrast.
The next looks flat.
Instead, aim for consistency across the entire gallery.
When your lighting is consistent during the session and your editing workflow stays the same, your galleries instantly look more polished and professional.
Clients notice that consistency, even if they can’t explain why.
Editing should feel simple, not stressful

Lightroom doesn’t have to feel overwhelming.
You don’t need to memorize every slider or use dozens of presets to create beautiful senior portraits.
Focus on getting great light first.
Then follow the same editing workflow every single time.
That’s exactly how we edit our natural light senior photos, and it’s helped us create consistent galleries while spending far less time behind the computer.
Remember…
Your goal isn’t to become the fastest editor.
It’s to become the most consistent one.
Want to master natural light? 🎥

If lighting still feels confusing, we’ve got you.
Our free Glow & Grow Training breaks natural light down step-by-step so you can stop guessing and start creating bright, consistent portraits with confidence.
Inside, you’ll learn how to find beautiful light, avoid harsh lighting situations, and create the soft, glowing portraits you’ve been working toward.
Grab your free seat below, and let’s make lighting finally click.
👉 Watch the free Glow & Grow training here:
https://esquaredphotography.com/glowandgrow
More places to hang out with us 📸
🎥 Watch the full YouTube video here:
https://www.youtube.com/c/ESquaredErinandEmily
📷 Follow us on Instagram:
https://www.instagram.com/esquared.photography/
🎁 Grab more free photography resources:
https://esquaredphotography.com/freebies
You are not behind.
You just need a plan.
Glow & Grow with E-Squared
How to Master Natural Light for Stunning, Client-Winning Portraits. This video training walks you through how to avoid bad light, deal with not ideal light, and find beautiful light.
Free Training


